KA 59 – Mechanical keyboard for Amiga 1200
Purpose
KA59 is a mechanical keyboard replacement for Amiga 1200. It is a complete replacement, no parts from original keyboard are needed. KA59 has been tested with original A1200 enclosures and ones from a1200.net project.
Features
- Complete replacement of original keyboard.
- Kailh KH switches rated for 50 million cycles.
- User adjustable CapsLock LED color.
- Optional "Alt"↔"Cmd" key position swap for users accustomed to PC keyboards.
- Weights less than original and takes less space.
- Robust connection with the mainboard.
Photos
Customization options
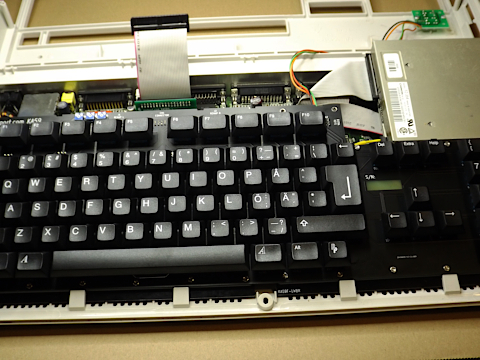
Keycap color set
There are two color sets available:
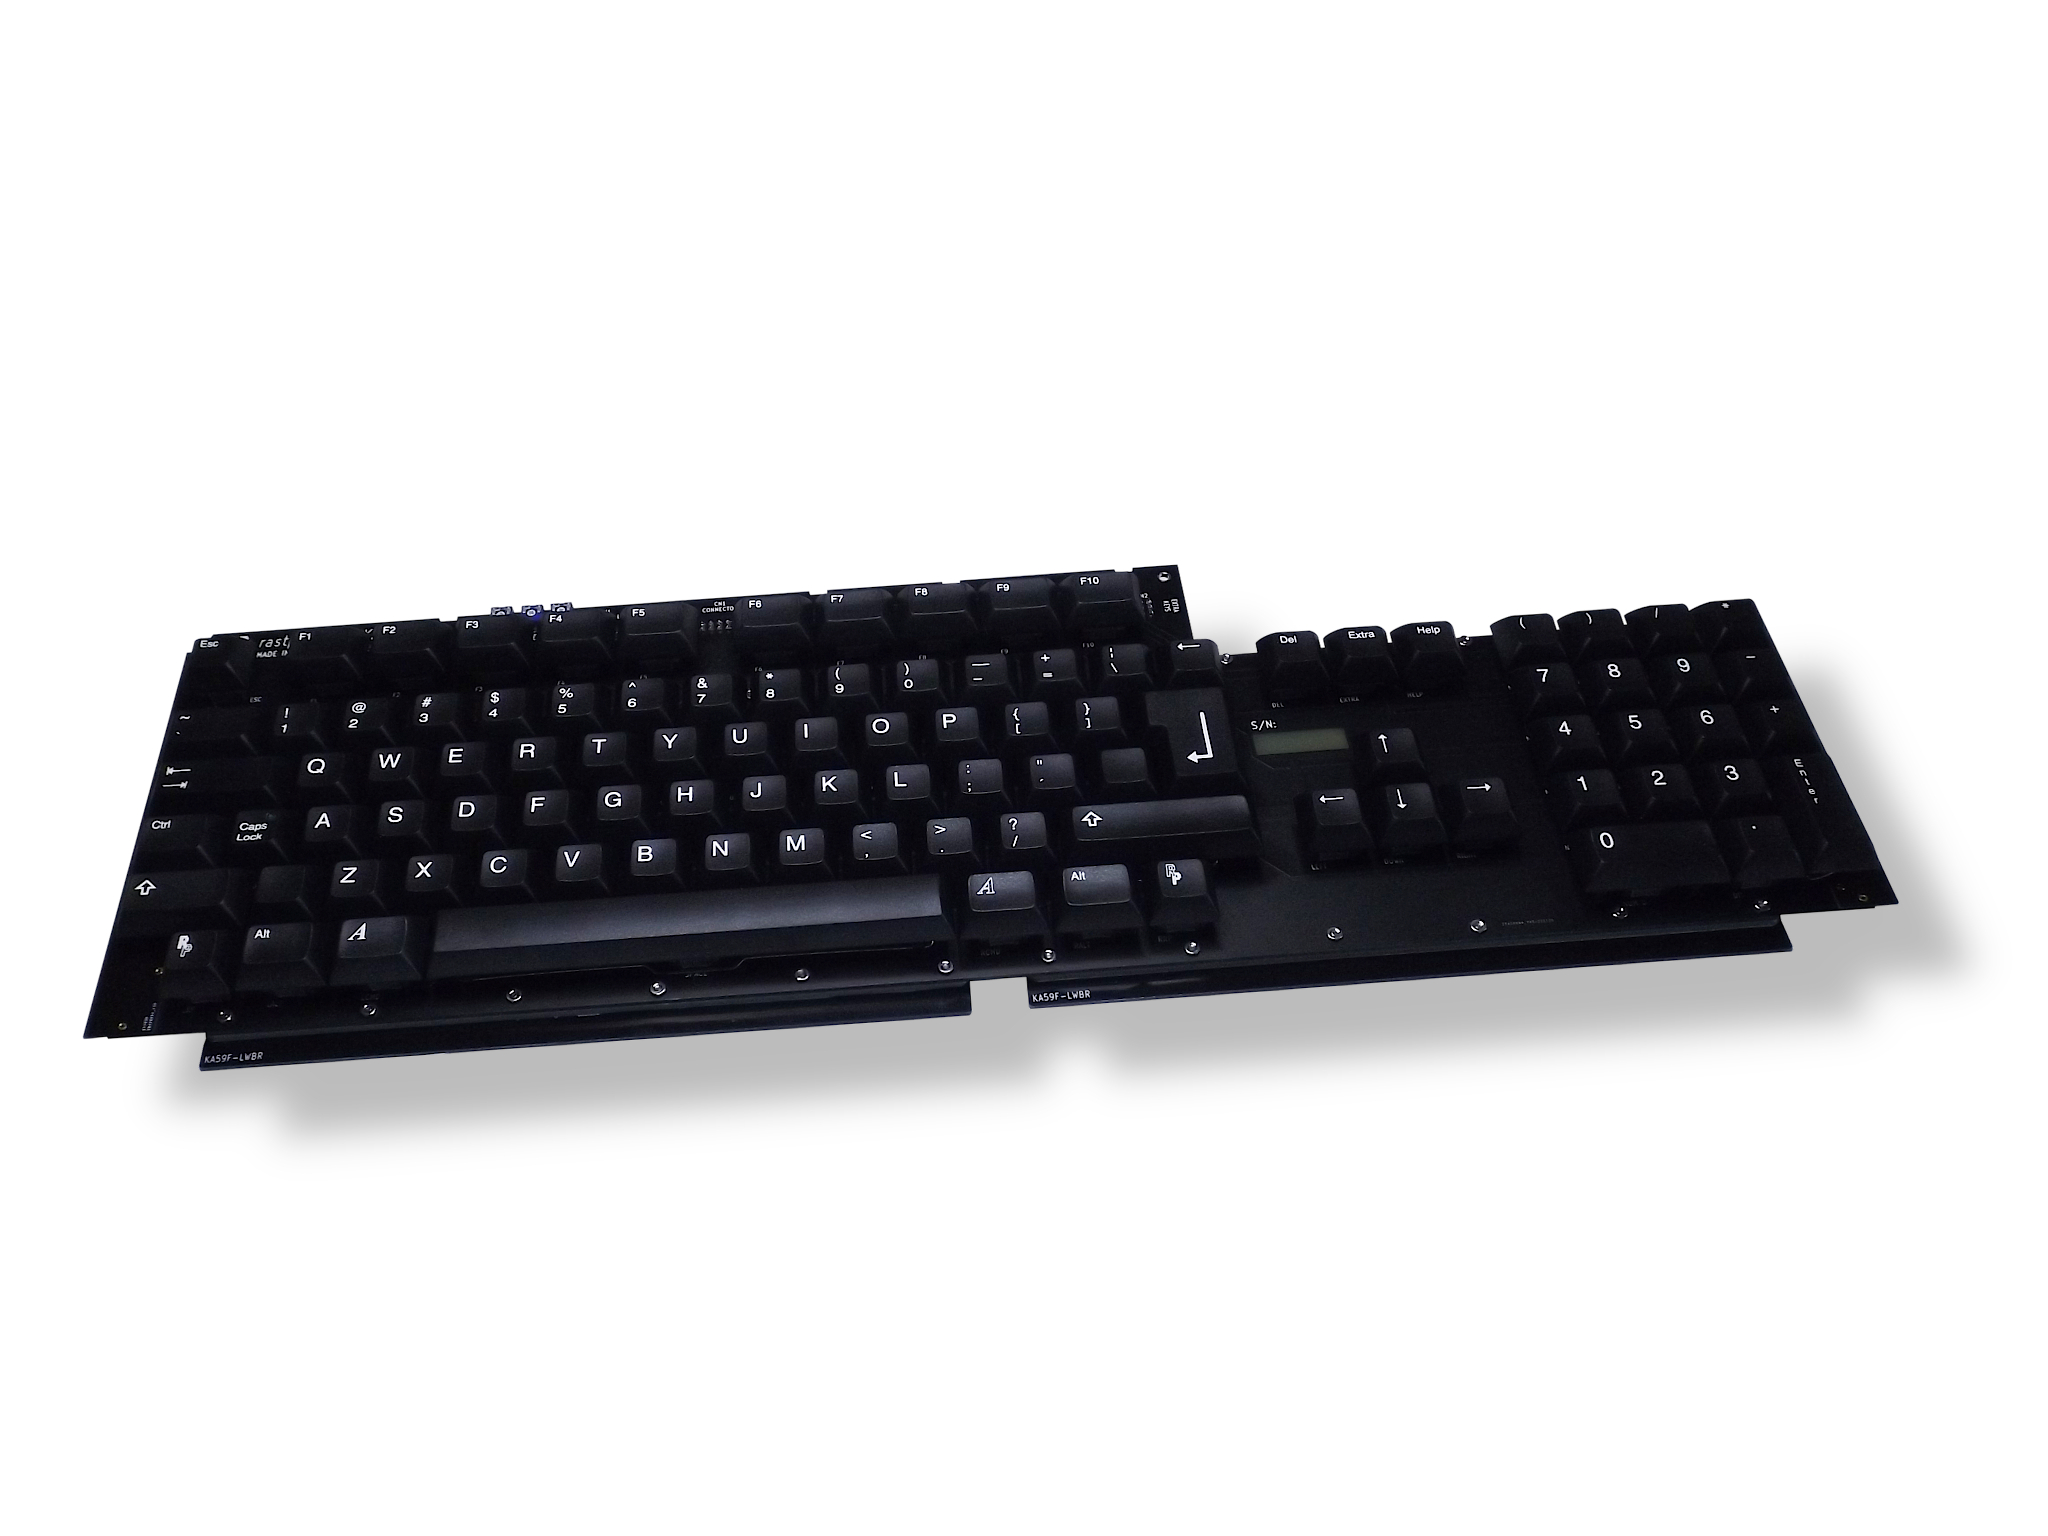
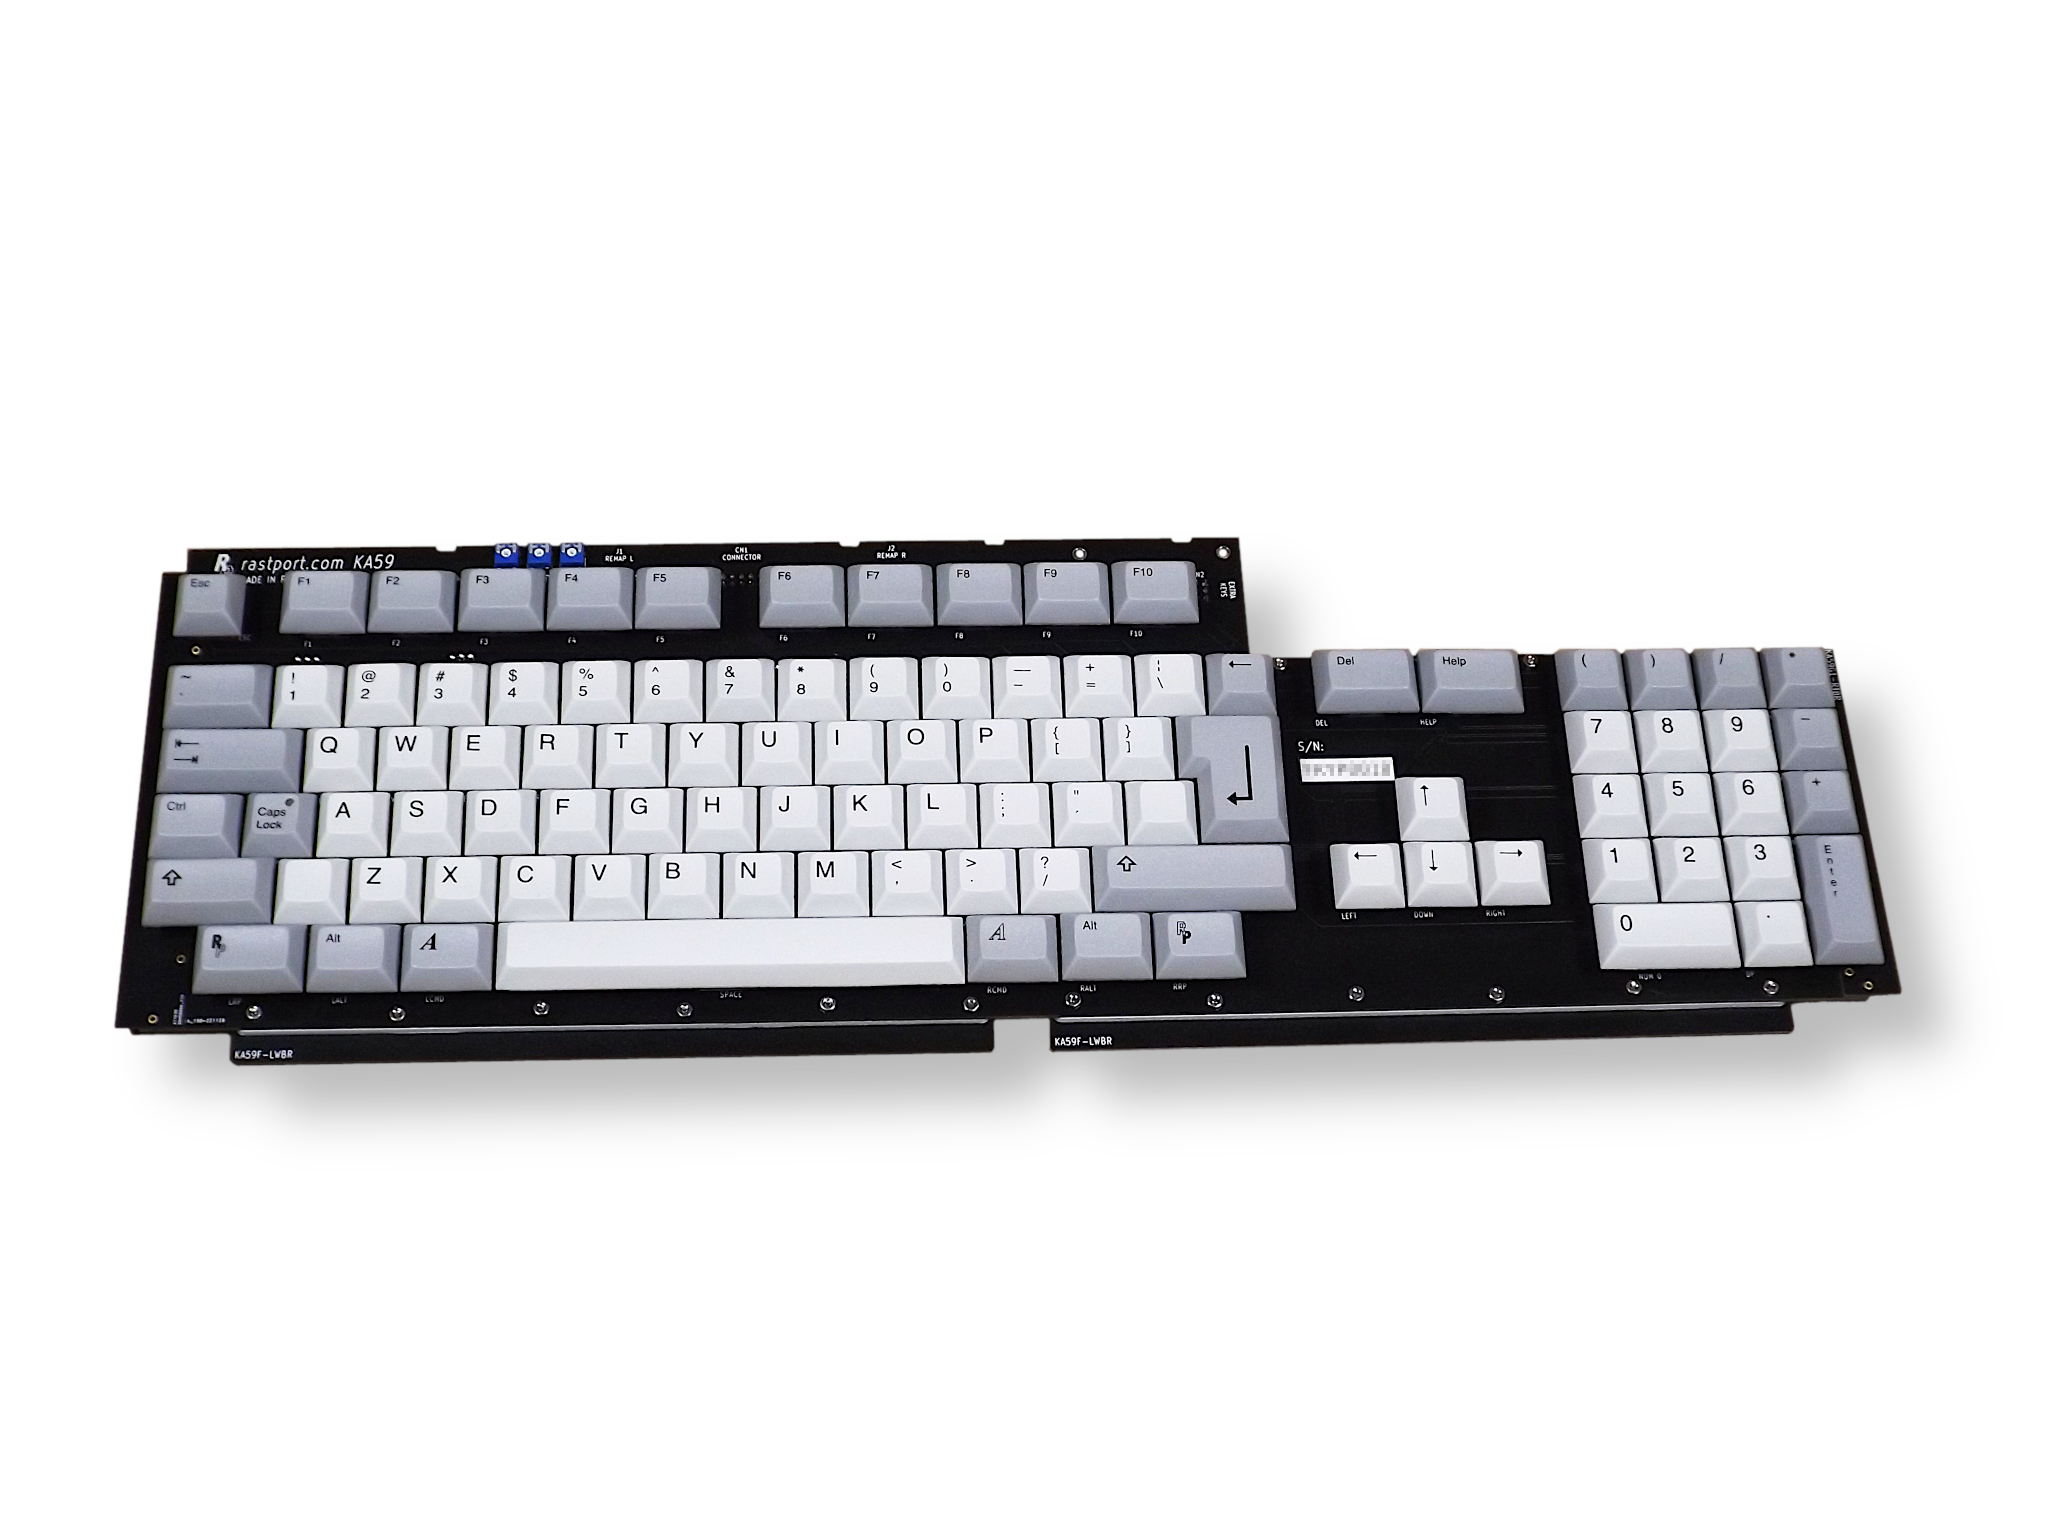
- classic gray and white, black overprints
- all keys black, white overprints
See photos above.
Switches
One of three different kinds of switches may be selected. Colors indicate mechanical characteristics of switches.
- Blue switches are tactile, force versus movement characteristic is not linear. As a result, user feels the moment of switching. They are also clicky, thanks to additional element hitting the switch enclosure when pressed and making sound.
- Brown switches are tactile (nonlinear) too, but have no clicking element, so are more silent.
- Red switches are linear, moment of switching action has no tactile feedback. Noise level is a bit below brown ones.
Language layout
Customer can select one of 11 language layouts:
- American
- British
- German
- French
- Italian
- Spanish
- Swiss
- Danish
- Swedish/Finnish
- Norwegian
- Icelandic
Installation

Step 1: Remove the Amiga upper cover. Start from unscrewing 5 screws from the bottom of the Amiga (3 short, 2 long on the sides). Then pull up the cover from the front side, so back side plastic clips disengage easily. Disconnect LED cable harness, so the upper cover can be put away.
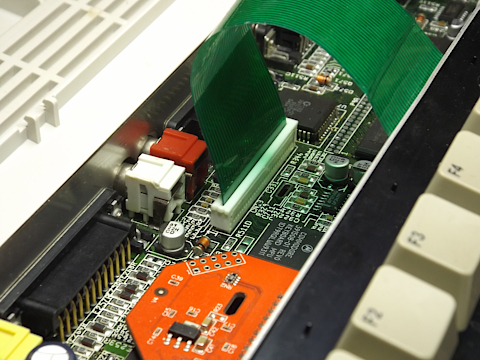
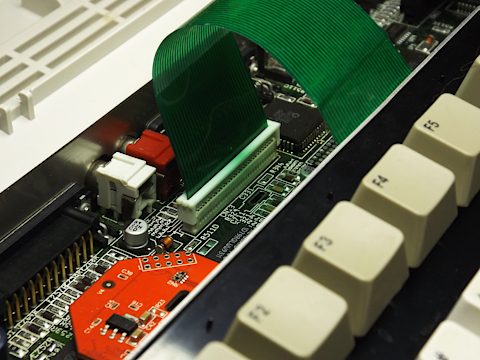
Step 2: Locate a white keyboard connector on the Amiga mainboard. Green membrane tail from the keyboard is connected to it. Do not pull the membrane tail yet, it is locked with a clamp. Release the clamp by pulling it up, as shown with red arrows.

Step 3: Gently pull the membrane tail out of the connector. Then move the keyboard a bit to the rear of the Amiga and take it out.
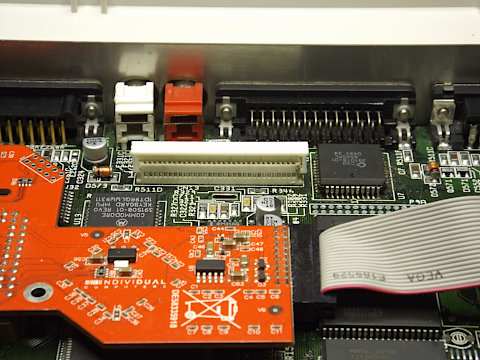
Step 4: Connector clamp is not needed for KA59, so it should be removed. The plug board of KA59 cable has thickness matched precisely to the connector. The clamp can be dismounted by gently wiggling it in Amiga front-rear direction and pulling it up at the same time. Store the clamp in a safe place. It may be needed when changing keyboard back to original one.
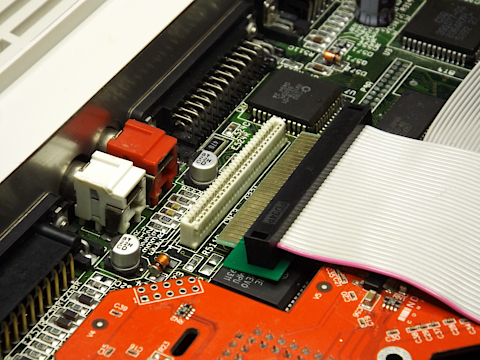
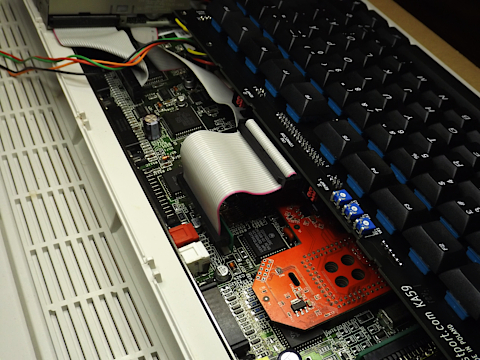
Step 5: Prepare to insert the KA59 ribbon cable plug into the connector. Gold plated contacts of the plug should be facing the rear of the Amiga.
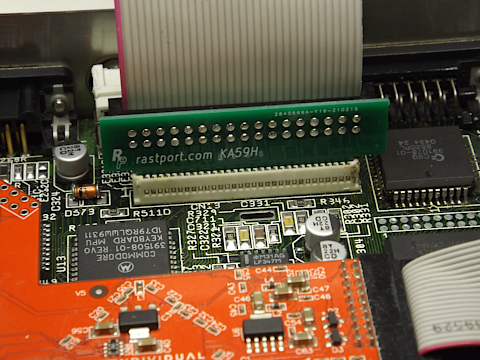
Step 6: Insert the plug now and push it down. Before applying force make sure the plug is aligned horizontally with the connector.

Step 7: Now put KA59 keyboard inside the Amiga, starting from the bottom edge. Bottom brackets should go under four plastic holders.
Step 8: Connect the keyboard end of the ribbon cable. The connector is keyed, so it can be done only one way.
Step 9: Installation is complete. Put the upper Amiga cover back, connecting back the LED cable harness. Latch plastic clips on the rear, then turn the Amiga upside down and screw back 5 screws removed in step 1. Keyboard is ready to work.
User Manual
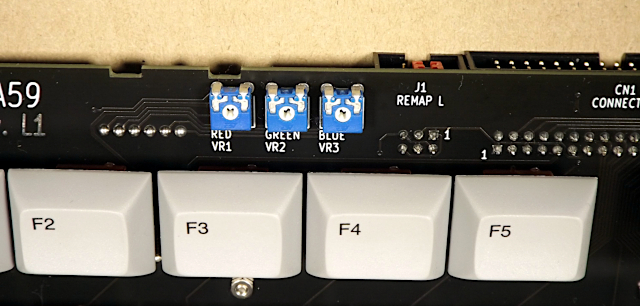
Adjusting CapsLock LED color
KA59 keyboard features RGB LED for CapsLock key. Therefore color of this LED can be adjusted by user. Adjustment is done by turning three potentiometers placed at the upper edge of the keyboard (see photo below). Potentiometers should be turned using a screwdriver with Philips 0 (PH0) tip. Please do not use random tools instead, as it may damage potentiometers. Each of potentiometers adjusts one color component, as written below them.